

Plyo Balls Baseball: Complete Training Guide
Posted by Editorial Team on 2026 Oct 11th
Table of Contents
- What Plyo Balls Are and Why Pitchers Use Them
- Choosing Baseball Plyo Ball Weights for Your Training Level
- Essential Plyo Ball Pitching Drills and Throwing Mechanics
- Building Your Plyo Ball Throwing Routine
- Where to Throw Plyo Balls Safely
- Arm Conditioning, Recovery, and Training Load Management
- Realistic Expectations and Measuring Progress
- Frequently Asked Questions
Last Updated: October 11, 2026
What Plyo Balls Are and Why Pitchers Use Them
Plyo balls baseball equipment consists of weighted baseballs designed to build arm strength and improve throwing mechanics through specialized training drills. Unlike standard practice baseballs, plyo balls range from light (3.5 ounces) to heavy (35 ounces), forcing your muscles to work harder with each throw. Pitchers use these weighted tools to develop explosive arm speed and build durability in their shoulders and elbows.
The core idea is simple: progressive resistance training. When you throw a heavier ball, your arm adapts by recruiting more muscle fibers and strengthening connective tissues. Over time, this translates to faster velocity and better control with a regulation baseball.
Pitchers use plyo balls for three main reasons:
- Arm strength development, heavier balls challenge your muscles more than standard baseballs
- Movement pattern training, specific drills teach your body proper mechanics and arm angles
- Arm conditioning, consistent throwing builds durability and reduces injury risk
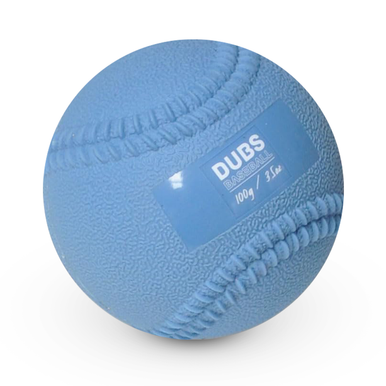
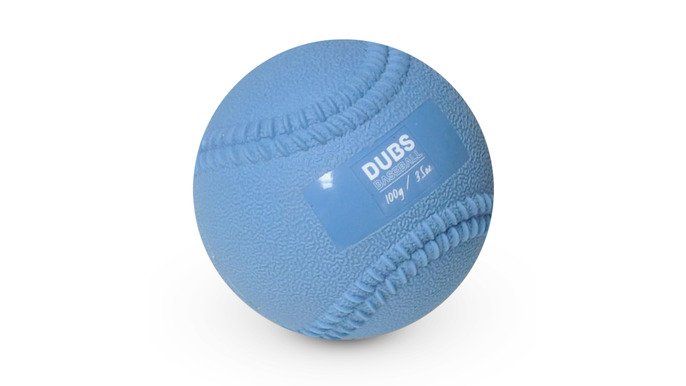
The seams molded into quality plyo balls give you a realistic grip and hand feel, so the mechanics you develop transfer directly to game situations.
Choosing Baseball Plyo Ball Weights for Your Training Level
Ball weight matters more than most people realize. Pick the wrong weight and you either waste time or risk injury. The right weight depends on your age, experience level, current throwing volume, and what you're trying to accomplish.
Age and Experience Baseline
Young players (ages 8-12): Start with the lightest options available. A 3.5-ounce plyo ball is ideal because it builds foundational strength without overwhelming developing muscles and joints. At this stage, focus on movement patterns and consistent mechanics rather than maximum force.
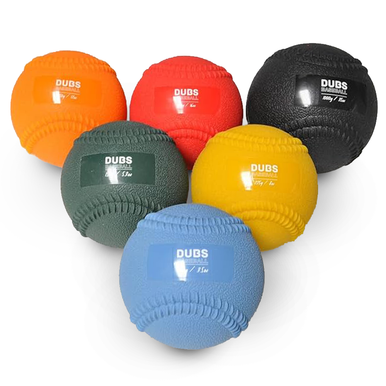
Intermediate players (ages 13-15): Progress to 5.3-ounce and 8-ounce balls. These weights challenge your arm without creating excessive stress. Alternate between lighter and heavier balls within the same workout to build adaptability.
Advanced players (ages 16+): You can safely use 8-ounce, 12-ounce, and 16-ounce balls depending on the drill. Heavier balls develop maximum strength, while lighter balls maintain arm speed and control.
Readiness Checklist Before Progressing Weight
Before moving to a heavier ball, confirm you meet these readiness signals:
- No pain or swelling after your last three plyo ball sessions
- Consistent mechanics across all reps in your current weight, video yourself or have a coach verify arm angle, stride, and follow-through remain stable
- Current throwing volume under control, you're throwing fewer than 75 pitches per week in games and bullpen work combined, not including plyo ball work
- At least 2 weeks of consistent training at your current weight with 2-3 sessions per week
- Adequate recovery, you're sleeping 7-9 hours per night and not experiencing persistent arm fatigue
If any of these is missing, stay at your current weight for another 1-2 weeks. Readiness matters more than age.
Special Considerations
Returning from injury or time off: If you've had arm soreness, tendinitis, or a layoff longer than 2 weeks, drop back one weight category from where you were. Rebuild tolerance gradually. Start with 3.5-ounce balls even if you're 16+, and progress over 4-6 weeks.
High throwing volume: If you're pitching in games, bullpen sessions, or long-toss programs that total 50+ pitches per week, use lighter plyo balls (3.5-5.3 ounces) and limit plyo work to once per week. Heavy plyo balls on top of high game volume compounds fatigue and injury risk.
Pitchers with a history of shoulder or elbow issues: Consult a sports medicine doctor or qualified throwing coach before starting plyo ball training. You may need to begin with 3.5-ounce balls regardless of age, or skip heavy balls (12+ ounces) entirely.
| Age Group | Baseline Weights | Readiness Check | Progression Timeline |
|---|---|---|---|
| 8-12 years | 3.5 oz | Pain-free, stable mechanics, 2 weeks at weight | 4-6 weeks per weight |
| 13-15 years | 5.3 oz, 8 oz | No swelling, video-verified form, <75 pitches/week | 3-4 weeks per weight |
| 16+ years | 8 oz, 12 oz, 16 oz | All readiness signals met, injury history cleared | 2-3 weeks per weight |
The progression is important. Never jump straight to heavy balls. Your tendons and ligaments need time to adapt. Start light, master the movement, then add weight gradually over weeks and months. If you're unsure whether you're ready to progress, err on the side of caution and spend another week at your current weight.
Essential Plyo Ball Pitching Drills and Throwing Mechanics
The best plyo ball drills teach your arm to move explosively while maintaining proper mechanics. Each drill targets a specific aspect of your throwing motion. Start slow, master the movement, then increase intensity.
Reverse Throws and Explosive Movement
Reverse throws build explosive power in your rotator cuff and rear shoulder. Stand facing a wall or net about 10 feet away. Hold a plyo ball at shoulder height with your elbow bent. Explosively throw the ball backward over your shoulder into the wall. Catch it and repeat.
This drill forces your arm to decelerate rapidly, which strengthens the muscles that protect your shoulder during normal throwing. Do 2 sets of 8-10 throws per arm with a lighter ball (3.5 to 5.3 ounces).
The key is explosive effort on each throw. Don't just lob the ball. Explode through the movement.
Marshall Throws and Arm Speed Development
Marshall throws are named after a popular baseball training method. Stand sideways to a wall, feet shoulder-width apart. Hold a plyo ball at chest height with your throwing-side arm. Explosively rotate your hips and core while throwing the ball into the wall at chest height.
The power comes from your lower body and core rotation, not just your arm. This teaches you to generate velocity from the ground up, which is how elite pitchers throw hard.
Do 3 sets of 10 throws per side with a 5.3-ounce or 8-ounce ball. Rest 60 seconds between sets.
Step-Behind and Rocker Drills for Movement Patterns
The step-behind drill teaches you to load your lower body properly. Stand facing a wall, feet hip-width apart. Step behind your back leg with your front leg while simultaneously cocking your arm. Then explosively step forward and throw.
This mimics the stride and arm action of an actual pitch. It forces you to sequence your movements correctly: legs first, then core, then arm.
The rocker drill is similar. Rock backward onto your back leg while cocking your arm, then rock forward explosively and throw. Both drills emphasize the importance of lower-body drive in generating arm speed.
Do 2 sets of 8 throws per side with a 5.3-ounce ball. Focus on smooth, controlled movement rather than maximum effort.
Building Your Plyo Ball Throwing Routine
A solid plyo balls baseball routine takes 15-20 minutes and should be done 2-3 times per week. More than that risks overuse injuries. Less than that won't build the adaptations you're looking for. The key is consistency, not intensity.
DPB-6PAC - Pitchers Plyo Ball Set with Carry Bag →
Pre-Training Readiness Check (2 minutes)
Before every session, spend 2 minutes assessing your arm's readiness:
- Arm soreness test: Gently rotate your shoulder forward and backward 5 times. Does it feel stiff or sore? If yes, reduce intensity by one drill or skip plyo work today and do light long-toss instead.
- Elbow and shoulder pain check: Raise your throwing arm overhead and gently pull your elbow behind your head. Any sharp pain? If yes, stop and rest for 24-48 hours.
- Sleep and fatigue assessment: Did you sleep 7+ hours last night? Are you feeling rested? If you're fatigued, reduce your session to 10 minutes and use lighter balls.
If all three checks pass, proceed to warm-up.
Complete Warm-Up Protocol (5 minutes)
Proper warm-up is non-negotiable. Cold muscles and connective tissues are injury-prone.
- Arm circles (1 minute): 20 forward circles, 20 backward circles, both directions. Start small and gradually increase the circle size.
- Shoulder mobility (1 minute): 10 cross-body shoulder stretches (hold 3 seconds each side), 10 sleeper stretches (hold 3 seconds each side).
- Easy throws with 3.5-ounce ball (3 minutes): 15 easy throws at 50% effort from 30 feet away. Focus on smooth, controlled mechanics. This primes your nervous system and gets blood flowing to your arm.
Sample Intermediate Routine (15 minutes active work)
- Warm-up (5 minutes): Follow protocol above
- Reverse throws (4 minutes): 2 sets of 8 throws with a 5.3-ounce ball, 60 seconds rest between sets
- Marshall throws (5 minutes): 3 sets of 10 throws with an 8-ounce ball, 60 seconds rest between sets
- Step-behind drill (3 minutes): 2 sets of 8 throws with a 5.3-ounce ball, 60 seconds rest
- Cool-down (2 minutes): 10 easy throws with a 3.5-ounce ball at 50% effort
Total session time: 19 minutes
Post-Session Soreness Log (1 minute)
After every session, note how your arm feels:
- Immediately after: Any sharp pain? (Should be no.)
- 2 hours later: Mild soreness is normal; sharp pain is not.
- Next morning: Rate soreness on a 0-10 scale. Anything above 3 means you went too hard or need more recovery.
Keep a simple log (even just notes on your phone) with the date, drills, ball weights, and soreness rating. Over 4-6 weeks, you'll see patterns: which drills cause soreness, whether you need more rest days, and when you're ready to progress.
Integration with Regular Pitching
Plyo ball training is a supplement, not a replacement for pitching practice.
- On plyo ball days: Do plyo work first (when your arm is fresh), then throw 20-30 easy pitches with a regulation baseball to reinforce mechanics. Do not throw hard or pitch in a game on the same day as heavy plyo work.
- On non-plyo days: Throw normally, bullpen sessions, long-toss, or game pitching. Your arm needs variety and recovery.
- Weekly structure example:
- Monday: Plyo ball routine + 25 easy regulation throws
- Tuesday: Light long-toss (50 feet, easy effort)
- Wednesday: Plyo ball routine + 25 easy regulation throws
- Thursday: Rest or very light throwing (20 easy throws)
- Friday: Plyo ball routine + 25 easy regulation throws
- Saturday: Game or bullpen session (if applicable)
- Sunday: Complete rest
This structure gives you 3 plyo sessions per week, 2-3 days of lighter throwing, and adequate recovery.
Adjusting Frequency and Volume
- If you're sore after sessions: Drop to 2 plyo sessions per week and add an extra rest day.
- If you're seeing progress and feel strong: You can maintain 3 sessions per week indefinitely, or occasionally add a 4th light session (using only 3.5-5.3 ounce balls) if recovery is excellent.
- During heavy game schedules: Reduce plyo work to once per week. Your arm is already working hard; plyo is supplemental.
Where to Throw Plyo Balls Safely
Location matters. You need a space where a missed throw won't damage property or hurt someone. A brick wall is ideal because it's solid and won't move. A net is your second-best option. Never throw plyo balls in an open field where you can't control where they go.
The best setup includes:
- A solid wall or net, at least 10 feet away
- Open space behind you, 6-8 feet to move freely
- Soft ground, grass or a gym floor, not concrete
- No people nearby, plyo balls are heavy and can cause injury if they hit someone
If you're training indoors, use a baseball net or hitting cage. Make sure the structure is sturdy enough to handle repeated heavy impacts.
Arm Conditioning, Recovery, and Training Load Management
Plyo ball training is intense. Your arm needs proper recovery to adapt and get stronger. Overtraining leads to tendinitis, arm soreness, and injury.
Watch for these signs that you need more recovery:
- Sharp pain in your shoulder or elbow during or after throwing
- Swelling or inflammation in your arm
- Persistent soreness that doesn't improve with rest
- Inability to throw with normal effort or velocity
If you experience any of these, stop plyo ball training and rest for 3-5 days. If pain persists beyond a week, see a sports medicine doctor.
Arm conditioning also includes flexibility and mobility work. Spend 5-10 minutes daily stretching your shoulders, rotator cuff, and forearm muscles. This improves your range of motion and reduces injury risk.
Realistic Expectations and Measuring Progress
Plyo ball training builds strength and arm speed over time, but don't expect overnight results. Most pitchers see noticeable improvements in arm strength and control within 4-6 weeks of consistent training. Velocity gains typically appear within 8-12 weeks.
Track your progress by measuring these metrics:
- Throwing velocity, use a radar gun or speed app to track mph
- Throwing accuracy, count strikes thrown to a target zone
- Arm endurance, number of throws before fatigue sets in
- Movement quality, video your throws to check mechanics
Your genetics, training age, and overall fitness all play a role.
The real benefit extends beyond velocity. You'll notice your arm feels stronger, your throws are more explosive, and you have better control. These improvements often show up in games before your radar gun does.
Plyo ball training is a proven way to build arm strength and improve throwing mechanics. Start with lighter weights, master the movement patterns, and progress gradually. The Dubs Baseball Pitchers Plyo Ball Set comes with six different weights in a convenient carry bag, so you can progress through all the training phases without buying multiple sets. Consistent training, proper recovery, and smart progression will help you develop the arm strength and velocity you need to compete at the next level.
Frequently Asked Questions
What weight plyo ball should a baseball pitcher use?
Weight selection depends on your age, experience level, and training objective. Younger players (under 12) typically start with 3.5-ounce balls; players aged 12-15 use 5.3 to 8-ounce balls; and advanced high school and college pitchers progress to 12-16 ounce options. Always begin with lighter weights to establish proper throwing mechanics before advancing. Heavier balls build maximum strength; lighter balls develop arm speed and explosive movement.
Can plyo balls help increase pitching velocity?
Plyo balls develop arm strength and explosive movement patterns that support velocity gains when combined with proper throwing mechanics and consistent training. They work by overloading the arm during constraint-focused drills that teach efficient movement. Results depend on your training routine, recovery practices, and baseline mechanics. Most players see measurable improvements over 8-12 weeks of consistent plyo ball work integrated into a broader throwing plan.
How often should pitchers do plyo ball training?
Most pitchers benefit from plyo ball training 2-3 times per week, with at least one rest day between sessions to allow arm recovery. A typical session includes 30-50 total repetitions across multiple drills, lasting 15-20 minutes. Beginners should start conservatively with once or twice weekly and progress gradually. Always monitor for arm fatigue or soreness and reduce frequency if either appears.
Are plyo balls safe for young baseball players?
Plyo balls are safe for young players when used with proper technique, appropriate weight selection, and adequate recovery. Start younger players (under 12) with the lightest options and focus on movement-pattern training before introducing heavy overload work. Watch for signs to stop training: sharp pain, persistent soreness, or loss of throwing control. Consult a coach or sports medicine professional if your young player experiences arm discomfort.